[swift] delegate와 notificationCenter을 이용해서 이벤트 전달하기
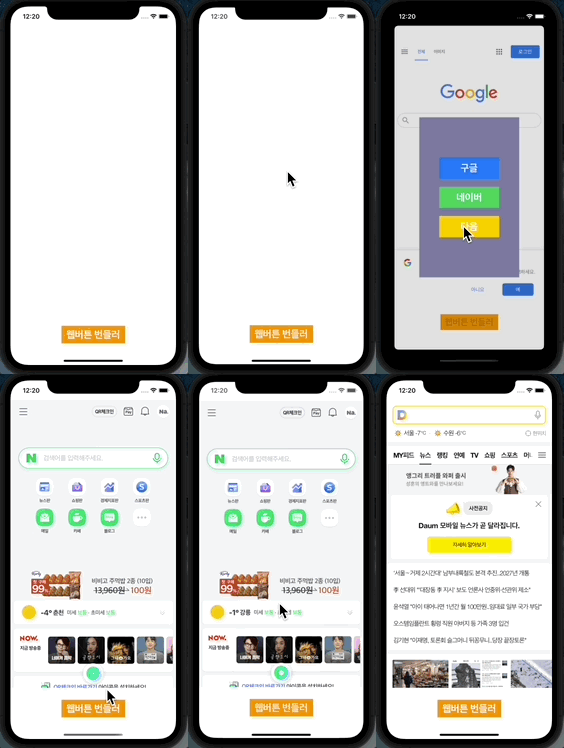
1️⃣ 목표

2️⃣ Delegate를 이용하여 이벤트를 전달하기
(1) protocol(프로토콜)로 구현된 delegate
UIKit에는 내장된 delegate들이 많이 있습니다. 이러한 delegate들은 다음과 같이
protocol(프로토콜) 타입으로 선언되어 있습니다.
protocol(프로토콜) 은 Java언어에서 interface(인터페이스)와 비슷한 개념입니다.- 즉,
protocol(프로토콜) 로 구현함으로써 해당 delegate를 어떻게 이용할 수 있는지 설계도와 같은 역할을 해줍니다. - 무조건 함수를 구현해야하는 interface(인터페이스)와 달리 다음과 같이 옵셔널(optional)을 이용하여 선택적으로 구현할 수 있도록할 수 있습니다.
protocol TempProtocol: AnyObject {
    optional func sumNumber(a: Int, b: Int) -> Int {
        return a + b
    }
}
- 또한
protocol(프로토콜) 은 프로퍼티의 초기값을 지정해줄 수 없습니다.
(2) 구현(delegate 이용)
- 이제 아래와 같이
protocol(프로토콜) 로 원하는 delegate를 만들어 사용할 수 있습니다. 구현의
핵심 은 다음과 같습니다.이벤트를 전달해줄 뷰컨트롤러에서
weak var myOpenWebDelegate: OpenWebDelegate?와 같이 delegate변수를 선언해준 뒤 내장함수를 사용하기
- 이벤트를 전달받는 뷰컨트롤러에서 delegate의 내장함수의 동작을 구현하기
이벤트를 전달받는 뷰컨트롤러에서
openWebBundlerVC.myOpenWebDelegate = self와 같이 델리게이트를 이곳에서 처리하도록 선언하기
/* OpenWebDelegate.swift */
import Foundation

protocol OpenWebDelegate {
    func openWebPage(url: URL)
}

/* WebButtonBundlerView.swift */
import UIKit

class WebButtonBundlerView: UIViewController {
    var myOpenWebDelegate: OpenWebDelegate?

    private func setUrlAndDismiss(_ urlString: String) {
        guard let url = URL(string: urlString) else { return }
        myOpenWebDelegate?.openWebPage(url: url)
        self.dismiss(animated: true, completion: nil)
    }

    @IBAction func handleOpenGoogleBtn(_ sender: UIButton) {
        setUrlAndDismiss("https://www.google.co.kr")
    }
	/* 생략(다른 버튼들) */
}

/* MainViewController.swift */
import UIKit
import WebKit

class MainViewController: UIViewController, OpenWebDelegate {

    @IBOutlet weak var myWebView: WKWebView!

    @IBAction func handleOpenWebBundlerBtn(_ sender: UIButton) {
        guard let openWebBundlerVC = self.storyboard?
                .instantiateViewController(withIdentifier: "WebButtonBundlerView")
                as? WebButtonBundlerView else { return }
        openWebBundlerVC.myOpenWebDelegate = self // delegate를 이곳에서 처리
        self.present(openWebBundlerVC, animated: true, completion: nil)
    }

    /* OpenWebDelegate 내장함수를 구현 */
    func openWebPage(url: URL) {
        myWebView.load(URLRequest(url: url))
    }
}
3️⃣ Notification을 이용하여 이벤트를 전달하기
- 이벤트를 전달받을 뷰컨트롤러, 이벤트를 전달할 뷰컨트롤러 총 2개의 swift 파일을 구현했습니다.
(1) 이벤트를 전달받을 뷰컨트롤러(MainViewController.swift)
- 이벤트를 전달받는다고 말했지만 엄밀히 말하면 이벤트를 감시합니다.
- 먼저
NotificationCenter를 이용하여 이벤트를 감시할 옵저버를 만들어 줍니다. delegate때와 마찬가지로버튼 을 누를 때 생성해주도록 만들어 줬습니다.
import UIKit
import WebKit

class MainViewController: UIViewController {

    @IBOutlet weak var myWebView: WKWebView!

    @objc func loadWebView(_ notification: Notification) {
        guard let url = notification.object as? URL else { return }
        myWebView.load(URLRequest(url: url))
    }

    @IBAction func openWebBtnBundlerView(_ sender: UIButton) {
        guard let openWebBundlerVC = self.storyboard?
                .instantiateViewController(withIdentifier: "WebButtonBundlerView")
                as? WebButtonBundlerView else { return }
        NotificationCenter.default.addObserver(self,
                                               selector: #selector(loadWebView),
                                               name: NSNotification.Name("openWebNotification"),
                                               object: nil)
        self.present(openWebBundlerVC, animated: true, completion: nil)
    }
}
- 위의 코드에서
핵심 적인 부분은NotificationCenter.default.addObserver()메서드 부분입니다. NSNotification.Name()로 원하는 옵저버명을 만들어 줍니다. (나중에 옵저버를 식별할 때 사용)- 옵저버가 이벤트를 감지했을 때 실행해줄
objc형태의seletor도 구현해줍니다.
(2) 이벤트를 전달할 뷰컨트롤러(WebButtonBundlerView.swift)
- 메인뷰에서 버튼을 클릭하면 노티피케이션의 옵저버(observer)가 생성됨과 동시에 팝업창이 열리도록 구현했었습니다.
- 팝업창에서 원하는 사이트버튼을 누르면 다음과 같이
post()메서드를 호출하도록 했습니다.
import UIKit

class WebButtonBundlerView: UIViewController {
    private func postUrlNotification(_ urlString: String) {
        guard let url = URL(string: urlString) else { return }
        NotificationCenter.default.post(name: NSNotification.Name("openWebNotification"), object: url)
        dismiss(animated: true, completion: nil)
        guard let presentingVC = self.presentingViewController as? MainViewController else {
            fatalError()
        }
        NotificationCenter.default.removeObserver(presentingVC, name: NSNotification.Name("openWebNotification"), object: nil)
    }

    @IBAction func handleOpenGoogleBtn(_ sender: UIButton) {
        postUrlNotification("https://www.google.co.kr")
    }
    /* 생략(다른 버튼들) */
}
post()의 인자로 이벤트 신호 전달할 옵저버의 이름을 넣어줍니다.- 또한
object파라미터를 이용하여 데이터를 전달할 수도 있습니다. - 주의할 점은 옵저버를 사용해준 뒤
removeObserver()메서드를 이용해서 옵저버해제(메모리를 해제)를 해주어야 합니다.
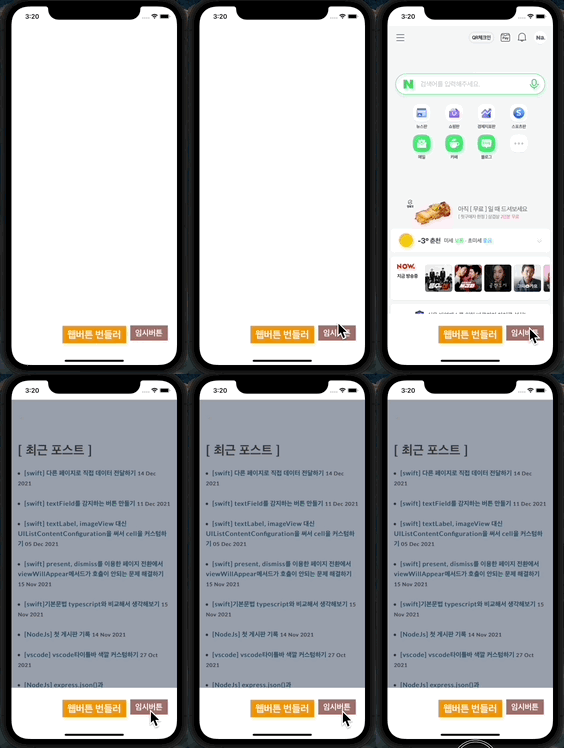
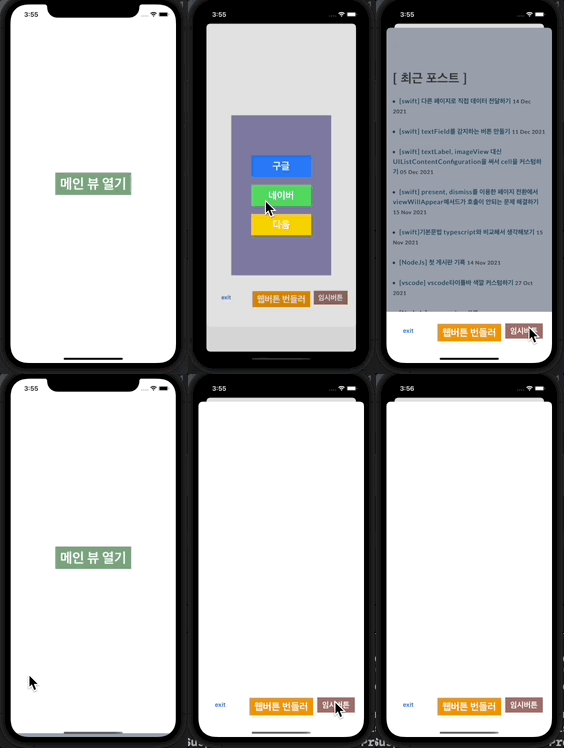
(3) 번외 - 만약 옵저버(메모리)를 해제하지 않는다면?
- 만약 옵저버를 해제하면 어떻게 될지 확인하기 위해 아래와 같이
MainViewController에 임시버튼을 생성해줬습니다.


4️⃣ delegate vs notification(개인적인 생각)
- 개인적으로 delegate를 이용하는 편이 다음과 같은 이유 때문에 유연해 보였습니다.
- 여러가지 처리함수(이벤트)를 하나의 delegate로 처리하도록 만들 수 있고 옵셔널사용유무에 따라 강제할 수도 있고 함수목록을 쉽게 확인할 수 있음
- notification의 파라미터
object는Any타입으로 전달되기 때문에 전달받는 입장에서 타입을 파악하기가 쉽지않아 실수할 가능성이 있다. - notification은 옵저버의 메모리 생성과 해제를 직접관리해주어야 한다.
- notification의 장점을 생각해본다면
- 여러객체의 옵저버에게 동시에 신호를 전달할 수 있다. (delegate도 가능하지만 코드가 길어짐)
- 옵저버자체의 식별자(이름)으로 감시하는 장점이 분명 있을 것 같음
- delegate뿐만아니라 notification도 UIKit에 내장된 것이 있는데(ex. 키보드감지notification) 그 이유가 있을 것이다.
- 결국, 각각의 장단점을 잘 파악해서 사용하는 것이 좋을 것 같습니다.
