[cub3d](13)xpm파일 벽에 입히기
1️⃣ 목표
- 저장된
xpm주소를mlx함수를 이용하여 적절한 데이터를 얻고벽에 입히는 것 이 목표입니다. - 적절한 데이터란
픽셀당 색(int), 텍스쳐 높이, 텍스쳐 넓이 입니다. 텍스터구조체는 다음과 같이 정의하였습니다.
typedef struct  s_texture
{
    char		*tex_path;
    int             *texture;
    double		width;
    double		height;
}               t_texture;
이 텍스쳐 구조체는 t_parse구조체가 배열로 가지고 있으며 각각의 인덱스마다 tex_path(xpm주소)를 저장해놨었습니다.
typedef struct  s_parse
{
    t_texture   tex[TEXTURE_COUNT];

    /* 코드 생략 */

}               t_parse;
2️⃣ xpm파일주소 읽기
(1) 텍스쳐읽기 함수1 (load_texture)
void		load_texture(t_god *god)
{
	int     i;
	t_img	img;

	i = -1;
	while (++i < TEXTURE_COUNT)
	{
		god->parse.tex[i].texture =
			load_image_malloc(god, god->parse.tex[i].tex_path, &img, i);
		free_memory(god->parse.tex[i].tex_path);
	}
}
TEXTURE_COUNT개의 텍스쳐파일을 하나씩 읽어드립니다.- 이 함수에서만 쓰일(임시)
img구조체를 선언하였습니다. - 읽기를 완료한
god->parse.tex[i].tex_path(텍스쳐 주소)는 이전에parse함수에서 동적할당을 하였기 때문에메모리 해제 를 해주어야 합니다.
(2) 텍스쳐읽기 함수2 (load_image)
static int	*load_image_malloc(t_god *god, char *path, t_img *img, int i)
{
	int		col;
	int		row;
	int		*result;

	if (!(img->ptr = mlx_xpm_file_to_image(god->mlx,
					path, &img->img_width, &img->img_height)))
		exit_error(god, ERROR, "WRONG TEXTURE!");
	god->parse.tex[i].width = img->img_width;
	god->parse.tex[i].height = img->img_height;

	img->data = (int *)mlx_get_data_addr(img->ptr,
			&img->bpp, &img->line_size, &img->endian);
	result = (int *)malloc(sizeof(int) * (img->img_width * img->img_height));
	row = -1;
	while (++row < img->img_height)
	{
		col = -1;
		while (++x < img->img_width)
		{
			result[img->img_width * row + col] = img->data[img->img_width * row + col];
		}
	}
	mlx_destroy_image(god->mlx, img->ptr);
	return (result);
}
- 각각의 텍스쳐당 한번씩 이 함수를 한번씩 호출합니다.
mlx_xpm_file_to_image함수를 임시 img구조체에 저장해줍니다. 이 함수에서는각 픽셀당 색 뿐만아니라높이 픽셀, 넒이 픽셀 값도 얻을 수 있습니다.img->data와 크기가 똑같은result변수를 동적할당하여 반복문을 통해 데이터들을 복사해줍니다. 그리고mlx_destroy_image함수를 통해img구조체를 초기화하였습니다.img구조체변수를 재사용이 아닌 각 텍스쳐마다 선언해주어 사용하면 굳이result변수를 만들어 복사할 필요가 없을 것아닌가 하고 생각했습니다. 하지만 우리가 필요한 것은img->data일 뿐이고프로그램을 종료 할 때mlx_dextroy_image함수를 각각의 텍스쳐img마다 호출하여야 합니다. 이것은 실수할 가능성이 크고 번거롭습니다. 어짜피result에 복사하는 반복문 은 프로그램 실행할 때 한번 이루어지는 것이기 때문에 부담이 없을 것이라고 생각합니다.
3️⃣ xpm파일 화면에 출력해보기
(1) 텍스쳐 크기로 출력
int main(int argc, char **argv)
{
    /* 코드 생략 */

    god.win = mlx_new_window(god.mlx, 64, 64, "mlx_title");
    god.img.ptr = mlx_new_image(god.mlx, 64, 64);
    god.img.data = (int *)mlx_get_data_addr(god.img.ptr, &(god.img.bpp), &(god.img.line_size), &(god.img.endian));

    / * 코드 생략 */

    load_texture(&god);

    for (int row = 0; row < 64; row++)
    {
        for (int col = 0; col < 64; col++)
        {
            god.img.data[64 * (row) + (col)] = god.parse.tex[1].texture[64 * row + col];
        }
    }
    mlx_put_image_to_window(god.mlx, god.win, god.img.ptr, 0, 0);

    /* 코드 생략 */
tex[1]에 저장된 텍스쳐의 높이와 넓이는 각각64픽셀 이였습니다. (printf()함수로 텍스쳐구조체에 저장된 width와 height를 확인해보면 됩니다.)- 하지만 항상 크기를
64 x 64의 크기로 사용할 수 없습니다. 거리에 따라크기, 방향 이 다르게 출력되어야 합니다.
(2) 윈도우 크기로 출력
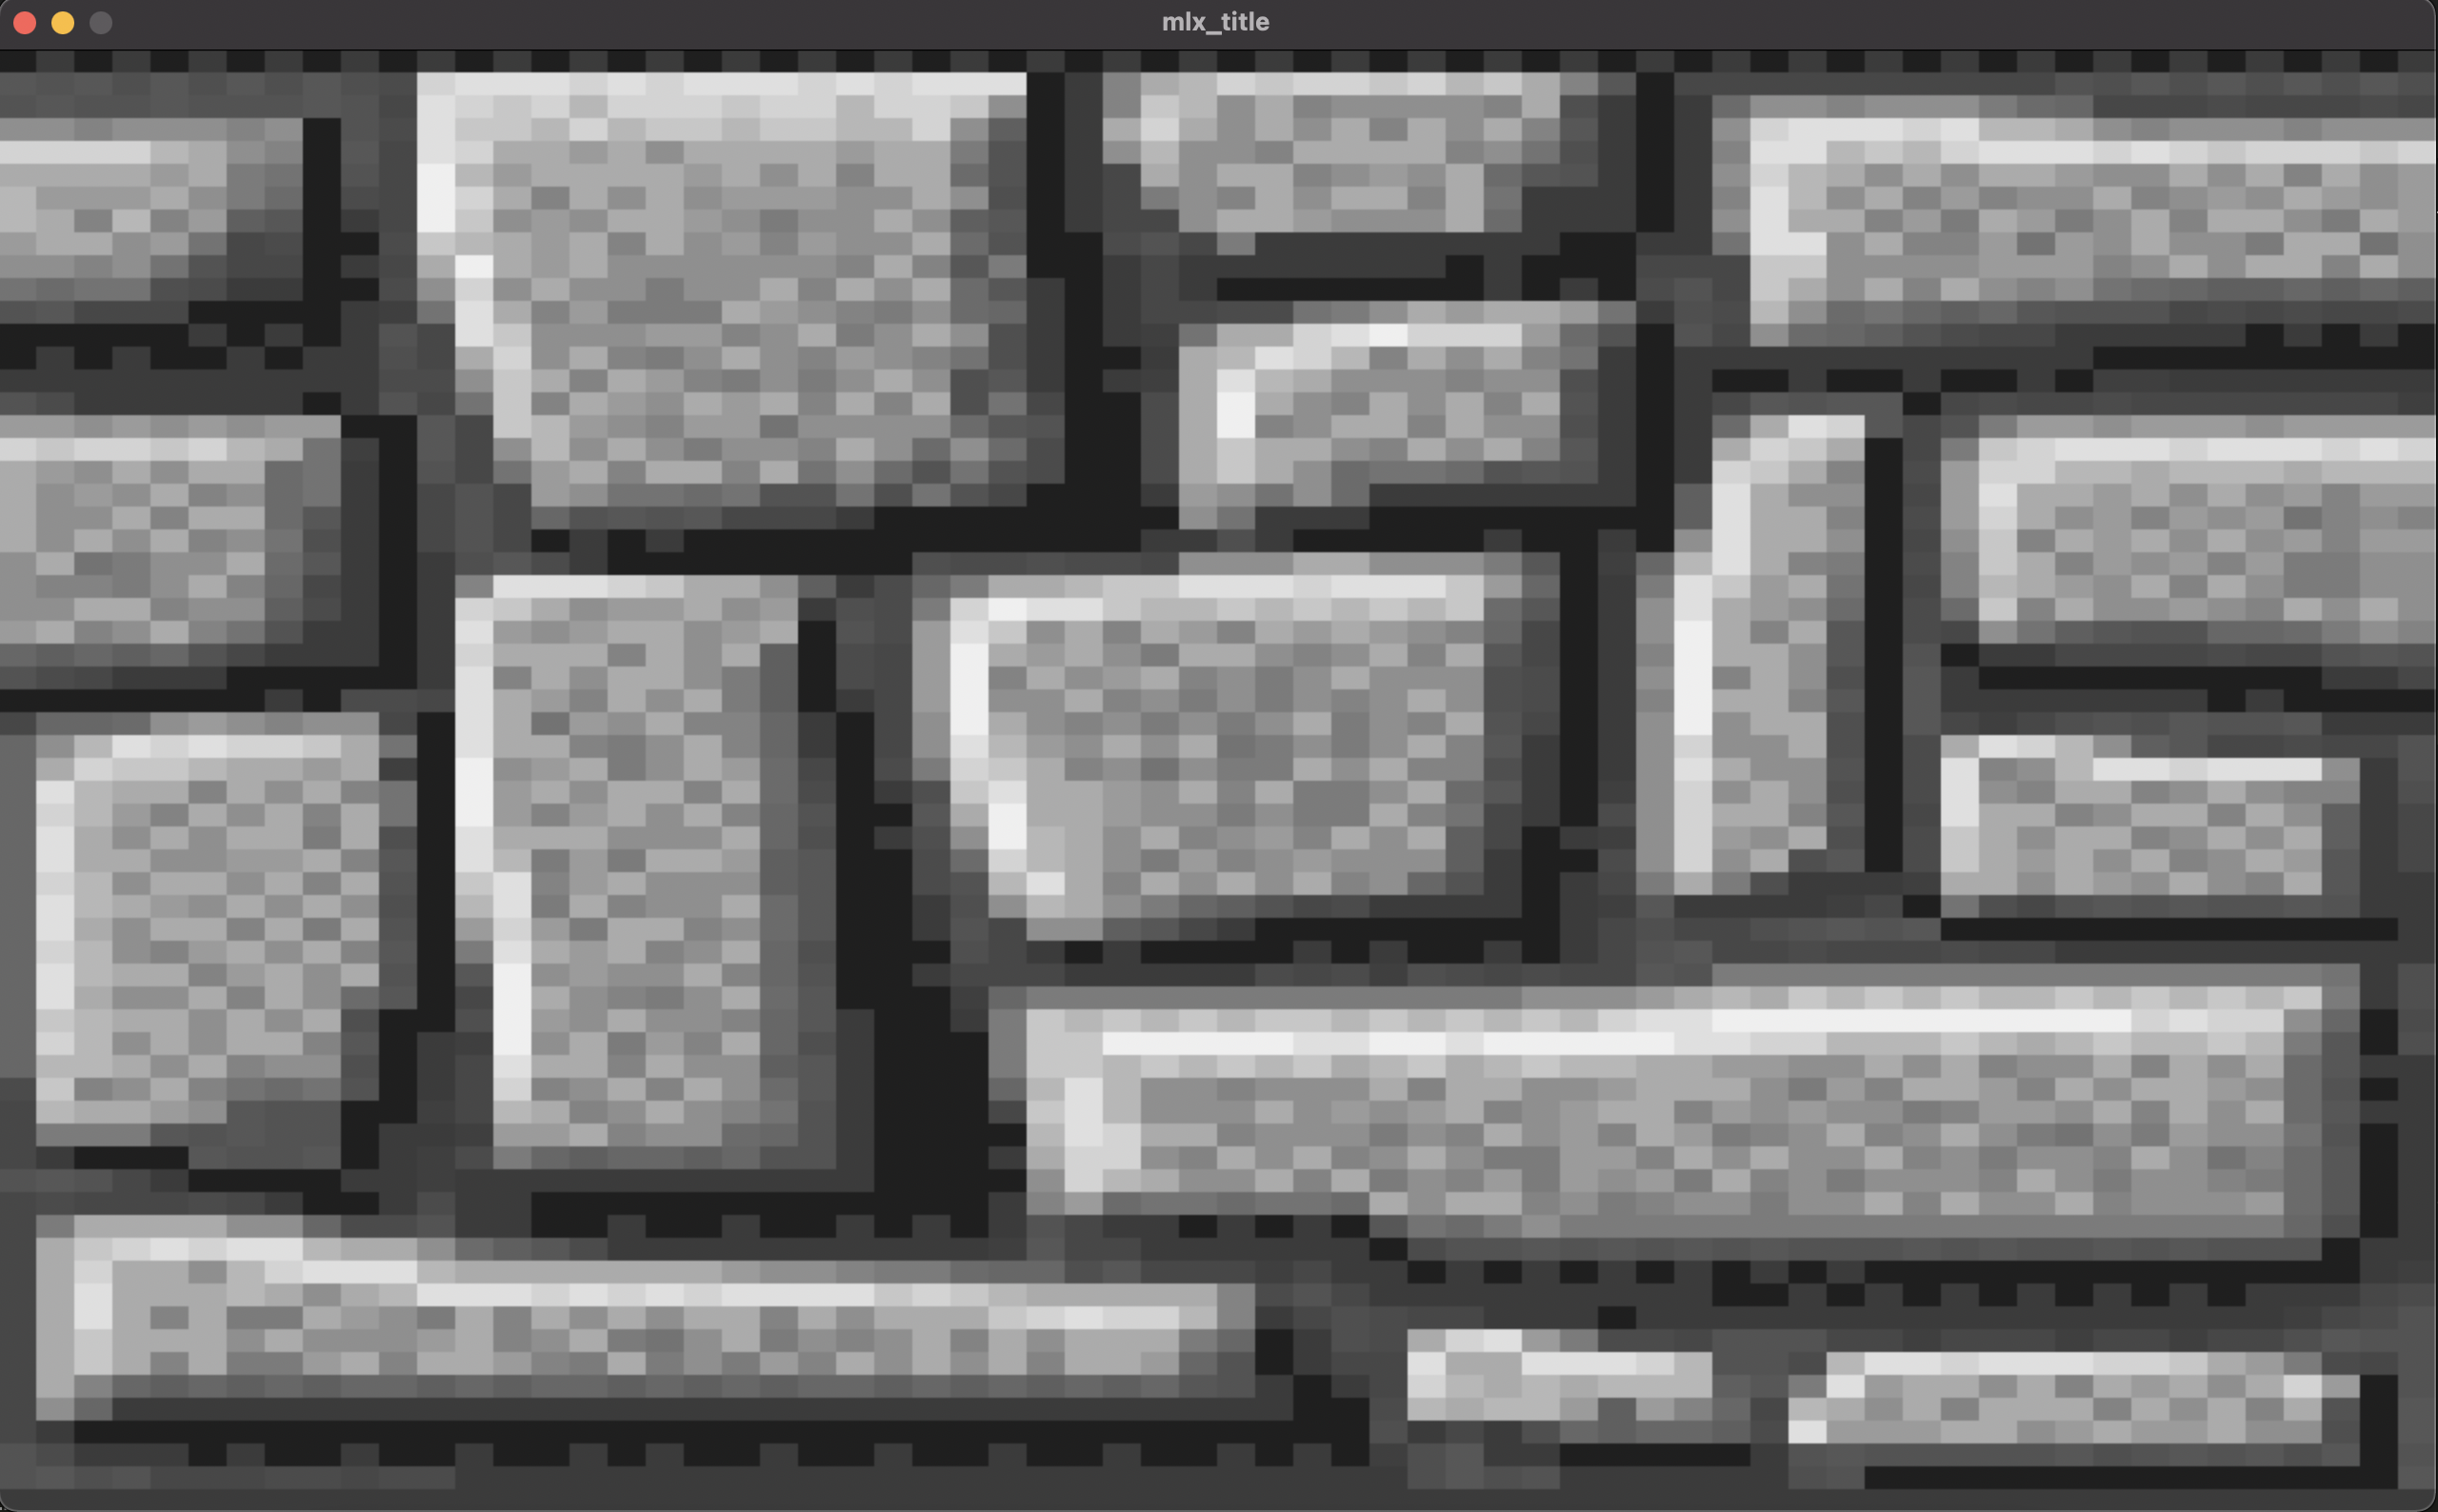
- 텍스쳐의 크기를 윈도우 크기에 맞춰서
보정 시켜주면 됩니다. 다음과 같이 보정한 색을 반환하는find_color함수를 구현하였습니다.
int		find_color(t_god *god, int col, int row)
{
	int color;
	int height = god->parse.tex[1].height;
	int width = god->parse.tex[1].width;
	int result_row = (height * row) / WINDOW_HEIGHT;
	int result_col = (width * col) / WINDOW_WIDTH;

	color = god->parse.tex[1].texture[width * result_row + result_col];
	return (color);
}
보정된 y좌표 = (텍스쳐높이 * y좌표) / 윈도우 높이;의 연산식으로 보정해주면 됩니다.
< 윈도우크기로 보정되어 출력된 모습 >
4️⃣ 3D벽에 텍스쳐 입히기
(1) 기존 3D렌더링 함수에서 수정할 부분
int color = god->ray.wasHit_vertical ? 0xFFFFFF : 0xAAAAAA;

for (int y = wall_top_pixel; y < wall_bottom_pixel; y++)
    for (int x = 0; x < WALL_STRIP_WIDTH; x++)
        if (god->img.data[WINDOW_WIDTH * y + (x + ray_num * WALL_STRIP_WIDTH)] == NO_COLOR)
            god->img.data[WINDOW_WIDTH * y + (x + ray_num * WALL_STRIP_WIDTH)] = color;
- 위와같은
벽을 그려주는 반복문 은 그대로 입혀줄 예정입니다. color를 수직, 수평벽에 따라 색을 다르게해서 칠해지도록 했습니다.- 하지만 이번에는
동, 서, 남, 북 에 따라 다른 벽의 색이 칠해지도록color대신 새로운 함수를 구현할 예정입니다.
(2) t_3d구조체 선언
- 함수를 구현하기에 앞서
3d렌더링관련 구조체 를 만들어 줬습니다. - 이 함수에서만 임시로 쓰이는 구조체이며 기존에 3D랜더링함수에 변수들이 너무 많아서 반드시 필요했습니다.
typedef struct  s_3d
{
    double      correct_distance;
    double      distance_plane;
    int         projected_wall_height;
    int         wall_top;
    int         correct_wall_top;
    int         wall_bottom;
    int         correct_wall_bottom;
    int         wall_height;
}               t_3d;
(3) t_3d변수 초기화 함수
- 3D랜더링에 필요한 변수(길이, 모니터까지 길이, 어안렌즈보정 길이 등등)들을
init_3D()함수에서 초기화할 수 있도록 구현하였습니다.
void    init_3D(t_god *god, t_3d *v)
{
    v->correct_distance = god->ray.distance * cos(god->ray.ray_angle - god->player.rotationAngle);
    v->distance_plane = (WINDOW_WIDTH / 2) / tan(FOV_ANGLE / 2);
    v->projected_wall_height = (int)((TILE_SIZE / v->correct_distance) * v->distance_plane);

    v->wall_top = (WINDOW_HEIGHT / 2) - (v->projected_wall_height / 2) - god->player.updown_sight;
    v->correct_wall_top = v->wall_top < 0 ? 1 : v->wall_top;

    v->wall_bottom = (WINDOW_HEIGHT / 2) + (v->projected_wall_height / 2) - god->player.updown_sight;
    v->correct_wall_bottom = v->wall_bottom > WINDOW_HEIGHT ? WINDOW_HEIGHT : v->wall_bottom;

    v->wall_height = v->wall_bottom - v->wall_top;
}
(4) 동, 서, 남, 북 방향을 판단해주는 함수
- 기존의
wasHit_vertical이라는 변수를 통해 광선이 수직, 수평으로 만나는지 알 수 있었습니다. - 여기에 x, y 각각의
player좌표 - 충돌좌표를 이용하면동, 서, 남, 북 의 방향을 알아 낼 수 있습니다.
void    set_wall_diretion(t_god *god)
{
    if (god->ray.wasHit_vertical == TRUE && (god->player.x - god->ray.wall_hitX) > 0)
        god->ray.wall_direction = T_WE;
    else if (god->ray.wasHit_vertical == TRUE && (god->player.x - god->ray.wall_hitX) < 0)
        god->ray.wall_direction = T_EA;
    else if (god->ray.wasHit_vertical == FALSE && (god->player.y - god->ray.wall_hitY) > 0)
        god->ray.wall_direction = T_NO;
    else
        god->ray.wall_direction = T_SO;
}
(5) 색을 결정하는 함수
- (1)번에서도 언급한
color변수 대신에 올 함수를 구현할 차례입니다.
int     set_wall_color(t_god *god, t_3d *v, int i)
{
    int col;
    int direction;
    int row;

    set_wall_diretion(god);
    direction = god->ray.wall_direction;

	/* 열(col) 좌표 */
    if (direction == T_WE || direction == T_EA)
        col = ((int)god->ray.wall_hitY % TILE_SIZE) * (god->parse.tex[direction].width / TILE_SIZE);
    else
        col = (int)god->ray.wall_hitX % TILE_SIZE * (god->parse.tex[direction].width / TILE_SIZE);

	/* 줄(row) 좌표 */
	row = (((v->correct_wall_top - v->wall_top + i) * god->parse.tex[direction].height) / v->wall_height);

    return god->parse.tex[direction].texture[(int)god->parse.tex[direction].height * row + col];
}
- xpm파일(텍스쳐)파일을 읽을 수 있게
col, row 좌표를 보정해주어 불러오면됩니다. - 다행히 벽들은
수직, 수평 으로 이루어져 있기 때문에col(열) 의 위치는 간단하게 찾을 수 있습니다.T_WE(서), T_EA(동)방향의 벽일 경우벽충돌지점 y좌표를 이용해 열(col)의 값을 찾습니다.T_NO(북), T_SO(남)방향의 벽일 경우벽충돌지점 x좌표를 이용해 열(col)의 값을 찾습니다.- 이값들을 단순히 xmp파일의 너비로
나눈 나머지(%) 가 열(col)값이 됩니다.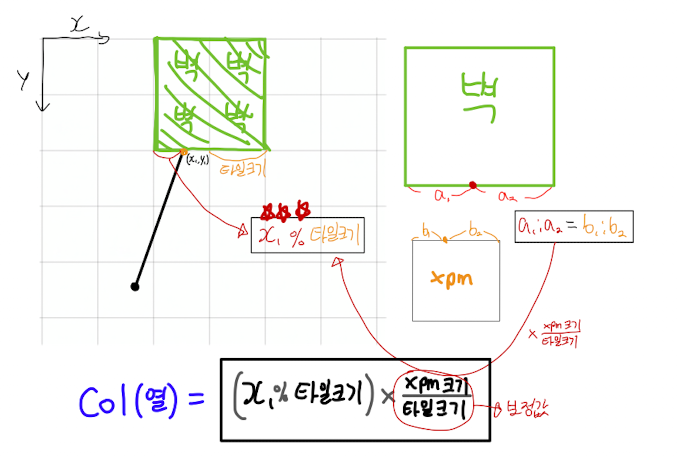
row(줄)값은 모니터에 보여지는벽의 길이(wall_height) 에 영향을 받습니다. 이전에 wall_height값을v->wall_height = v->wall_bottom - v->wall_top;공식으로 구했습니다.- 또한 상황에 따라서
벽이 잘리는 부분 이 생기게 되는데correct_wall_top과wall_top변수의 차이를 이용했습니다. 즉, 그 차이의 지점부터row값이 할당될 것입니다. - 당연히 마지막에
xpm파일크기에 맞게보정 을 해줘야 합니다.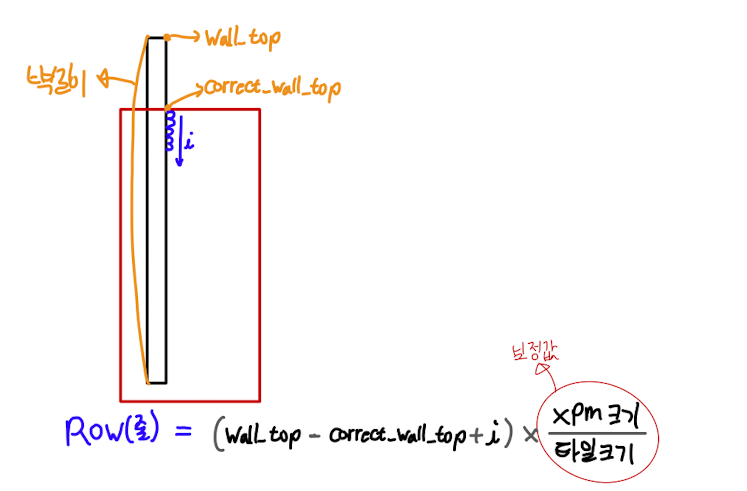
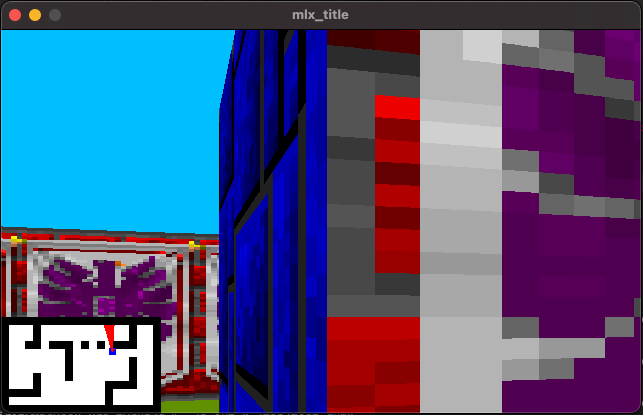
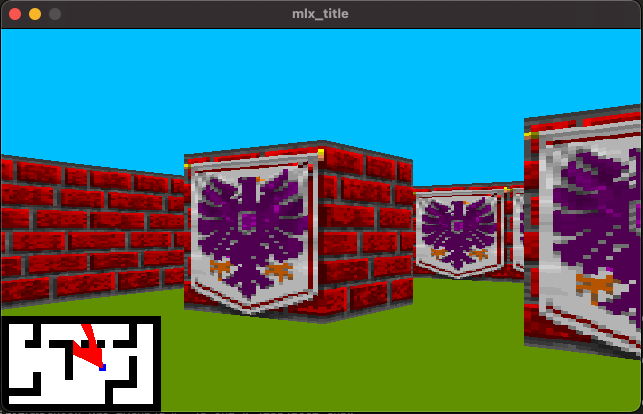
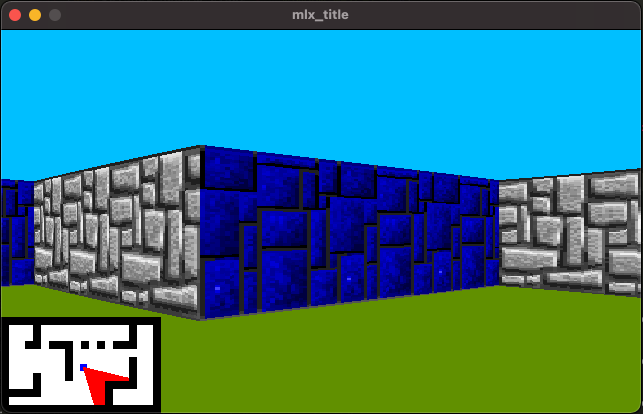
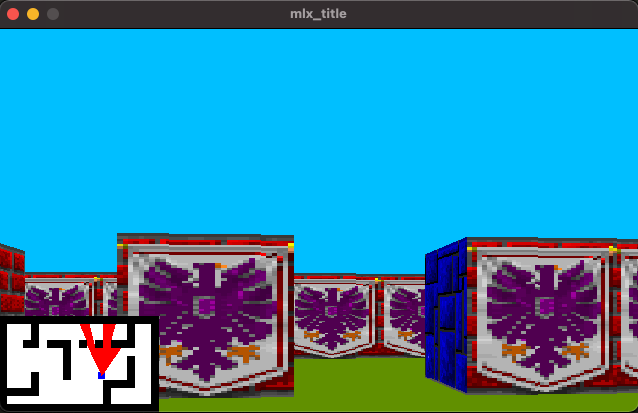
5️⃣ 3D 랜더링된 모습
< 북, 서 방향 >
< 남, 동 방향 >
< 최대한 위쪽을 바라볼때 >
< 벽이 잘리는 상황일때 >
